Appearance
Withdraw NFTs To Opensea From Layer 2 With Self-Hosted Metadata
Introduction
Welcome to this comprehensive guide on withdrawing your NFTs to layer 1, enabling you to trade them on popular marketplaces like OpenSea. By following the step-by-step instructions provided below, you'll gain the knowledge and skills required to successfully complete the process:
- Deploy an ERC721 mintable contract
- Mint some NFTs
- Set up your metadata server
- Check your NFTs
- Withdraw NFTs to layer 1
Deploy an ERC721 mintable contract
You can effortlessly deploy an ERC721M smart contract on layer 1 using RedSonic's Dashboard. To get started, follow these simple steps:
- Sign up on the RedSonic Dashboard and log in to your account.
- Go to the contracts page and locate the "Deploy/Import Contracts" button.
- Click on "Deploy Contracts" and choose ERC721 (Mintable and Recommended) from the options provided.
To ensure you have full control over the metadata hosting, disable the "Host Metadata on RedSonic" switch. In this tutorial, we will be hosting the metadata ourselves.
Next, you will need to provide the URI for storing the metadata. Make sure the URI is accessible via the internet, allowing others to access your metadata from the servers. We will fill in http://123.206.xxx.xxx/tokens/, since we will use this for returning metadata.
Once you have entered all the necessary information for the contract, click on "OK" to proceed.
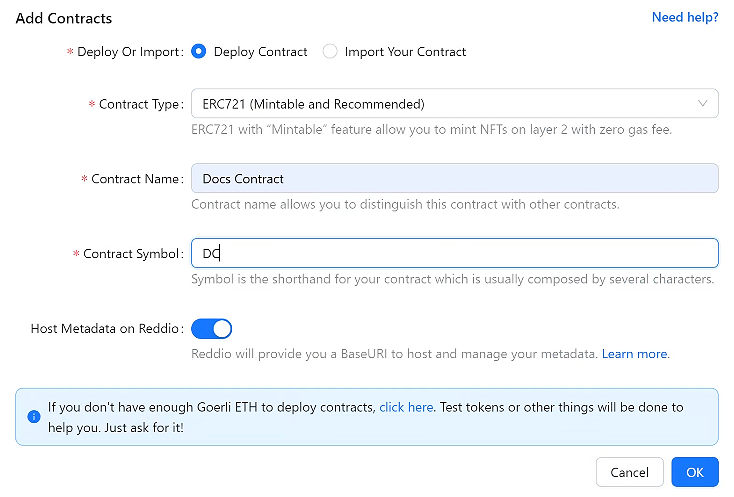
Then, your wallet will pop up to prompt you to sign the transaction. Once you have successfully signed all the transactions, your deployment will be processed.
After your deployment process is finished, you will see your new contract name under "Contracts" page:

To further explore the smart contract details on layer 1, you can refer to the comprehensive guide provided by RedSonic, which will guide you through the process of checking the smart contract details on Etherscan.
Mint some NFTs
Minting NFTs on layer 2 is a simple and cost-free process. To begin, follow these steps:
- Click on your contract name to navigate to the contract's detail page.
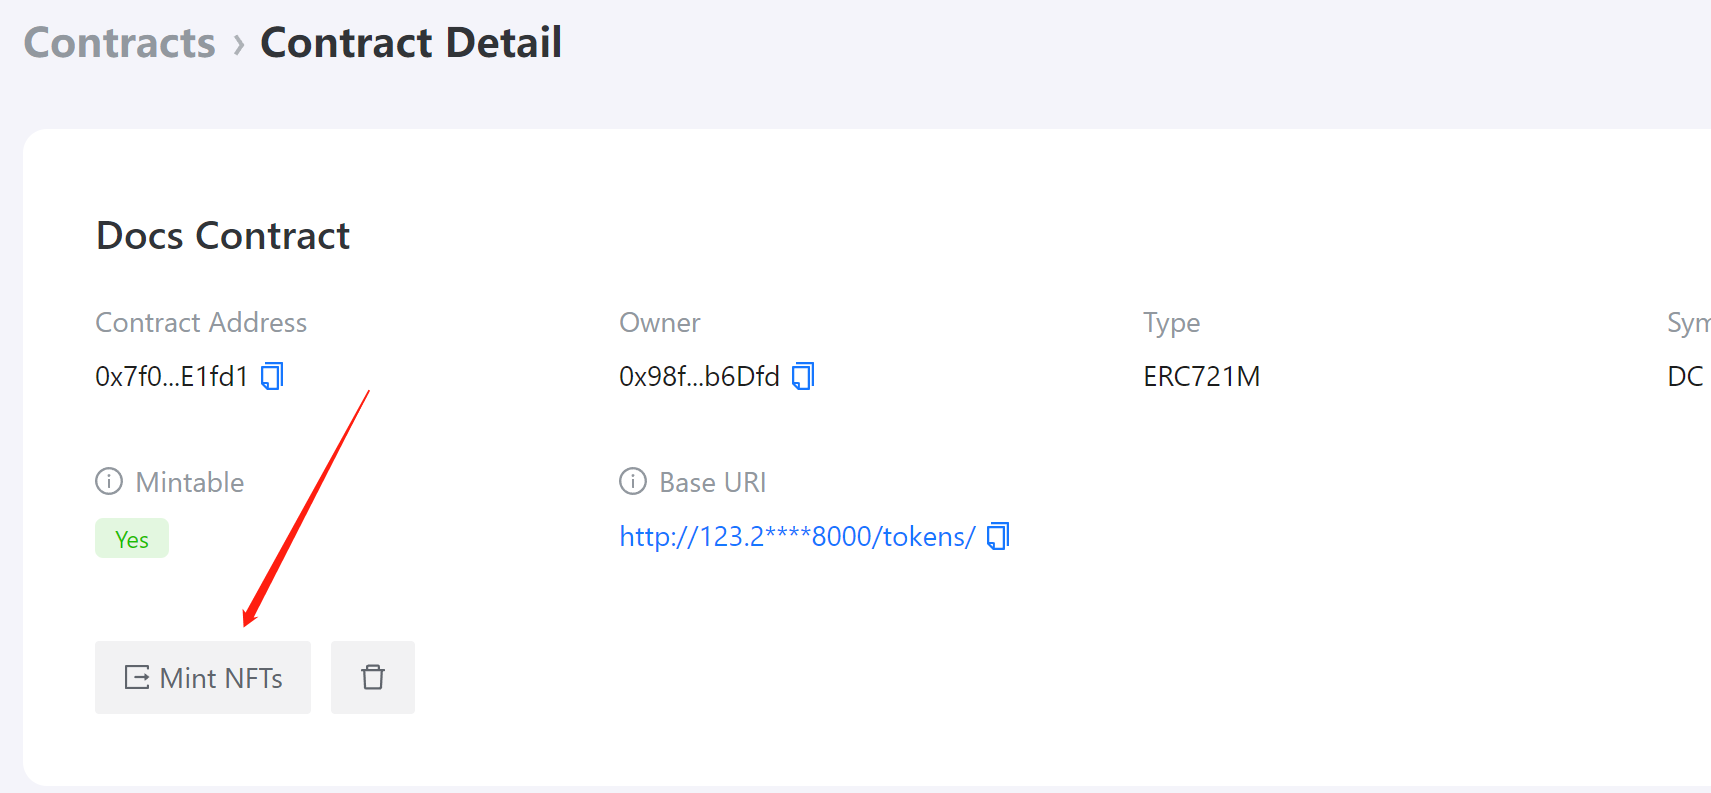
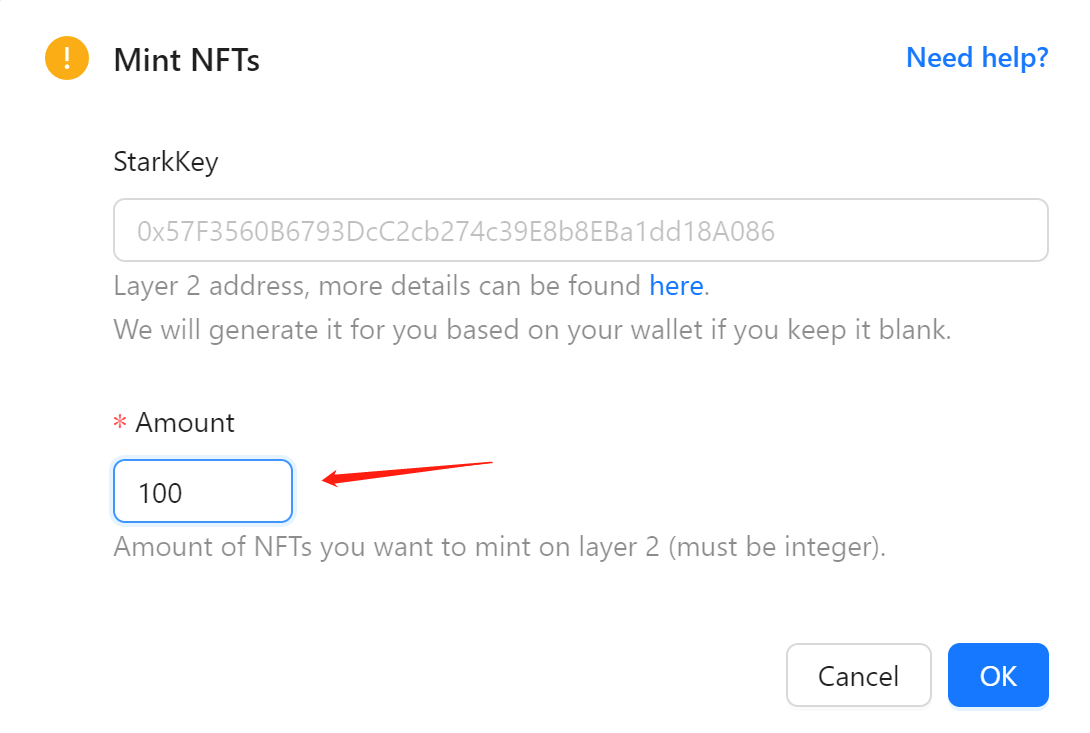
On the contract detail page, locate the "Mint NFTs" button and click on it. Specify the desired quantity of NFTs you wish to mint on layer 2.
After entering the desired quantity, click on the "OK" button to initiate the minting process.
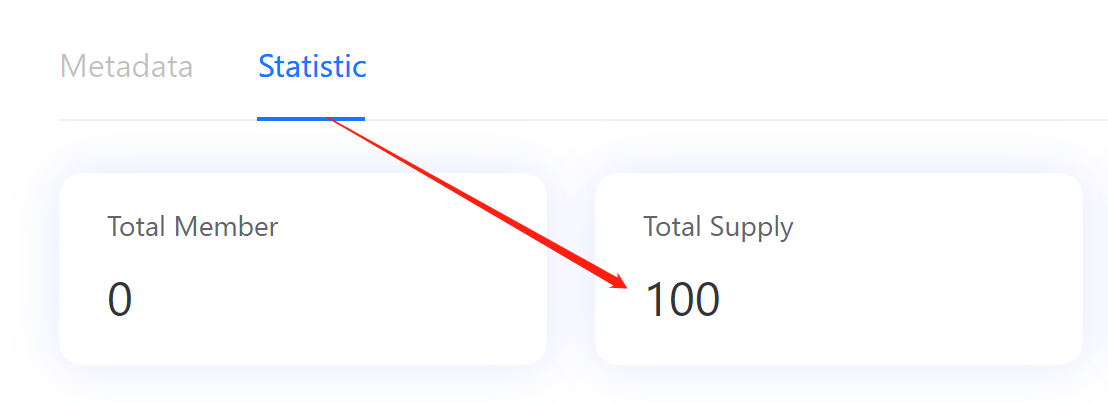
- Once the minting process is completed successfully, you will observe an increase in the "Total Supply" number under the "Statistics" section.
Set up your metadata server
After minting NFTs. We need to attach our metadata to the NFTs. Although metadata doesn't have any specified standarads, you need to make sure your metadata follow Opensea's standarads so that your NFTs can display properly on marketplace like Opensea. To learn more about Opensea's metadata standarad, please click here.
Now, assuming we would like to make our NFTs' name like "Reddio NFT 1" and "Reddio NFT 2" ("1" and "2" are tokenId) with specific iamges and some other details:
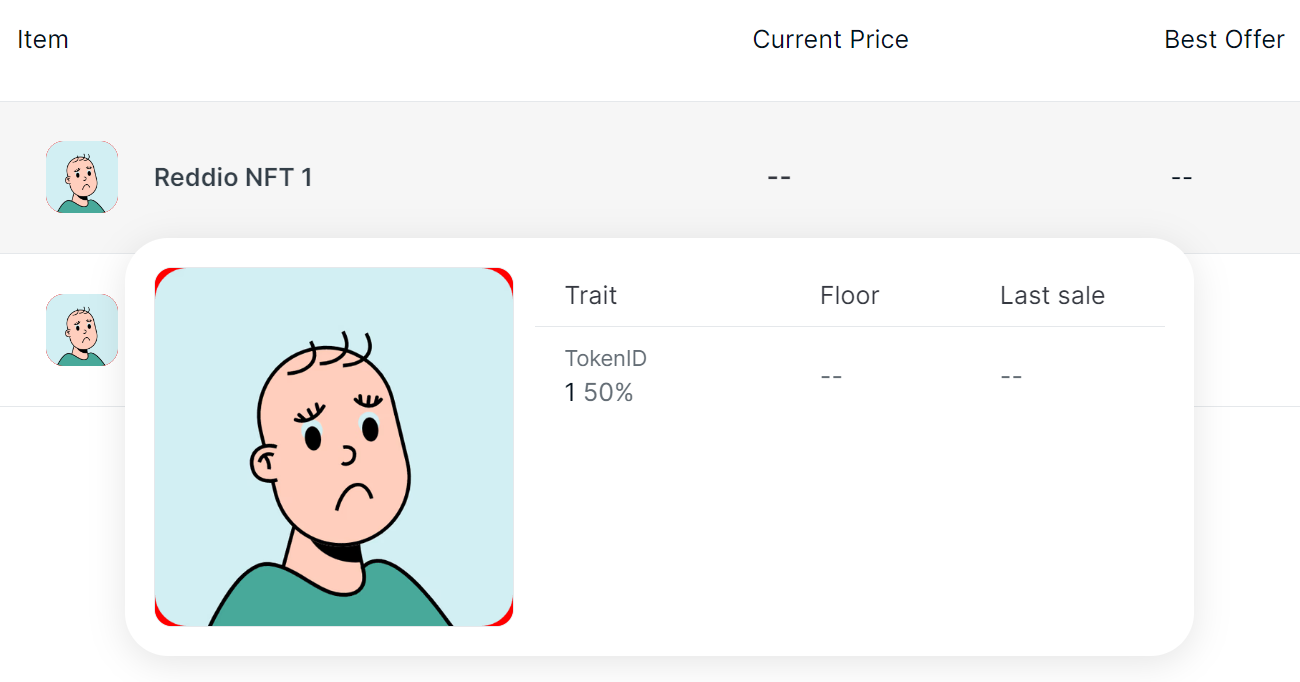
To do that, we need to return following response on http://123.206.xxx.xxx/tokens/1:
json
{
"description":"This is a reddio test NFT.",
"image":"https://i.seadn.io/gcs/files/e67d2f06bcaa24a5ebb328a6a60c4582.png",
"name":"Reddio NFT 1",
"background_color":"FF0000",
"attributes":
  [
  {"trait_type":"Tokenid","value":"1"}
  ]
}
Therefore, we need a metadata server that returning metadata according to the tokenId. Here is a Python sample code with FastAPI module to do such a task:
python
from fastapi import FastAPI
import json
import uvicorn
from fastapi import FastAPI
from fastapi.responses import JSONResponse

@app.get("/tokens/{tokenId}")
def returnTokens(tokenId: int):
    data = {
  "description": "This is a reddio test NFT.",
  "image": "https://i.seadn.io/gcs/files/e67d2f06bcaa24a5ebb328a6a60c4582.png",
  "name": f"Reddio NFT {tokenId}",
  "background_color": "FF0000",
  "attributes": [
    {
      "trait_type": "Tokenid",
      "value": f"{tokenId}"
    },
  ]
    }
    headers = {"X-Custom-Header": "Custom Value"}
    return JSONResponse(content=data, headers=headers, status_code=200)

if __name__ == '__main__':
    uvicorn.run(app,port=8000,host='0.0.0.0')
Check your NFTs
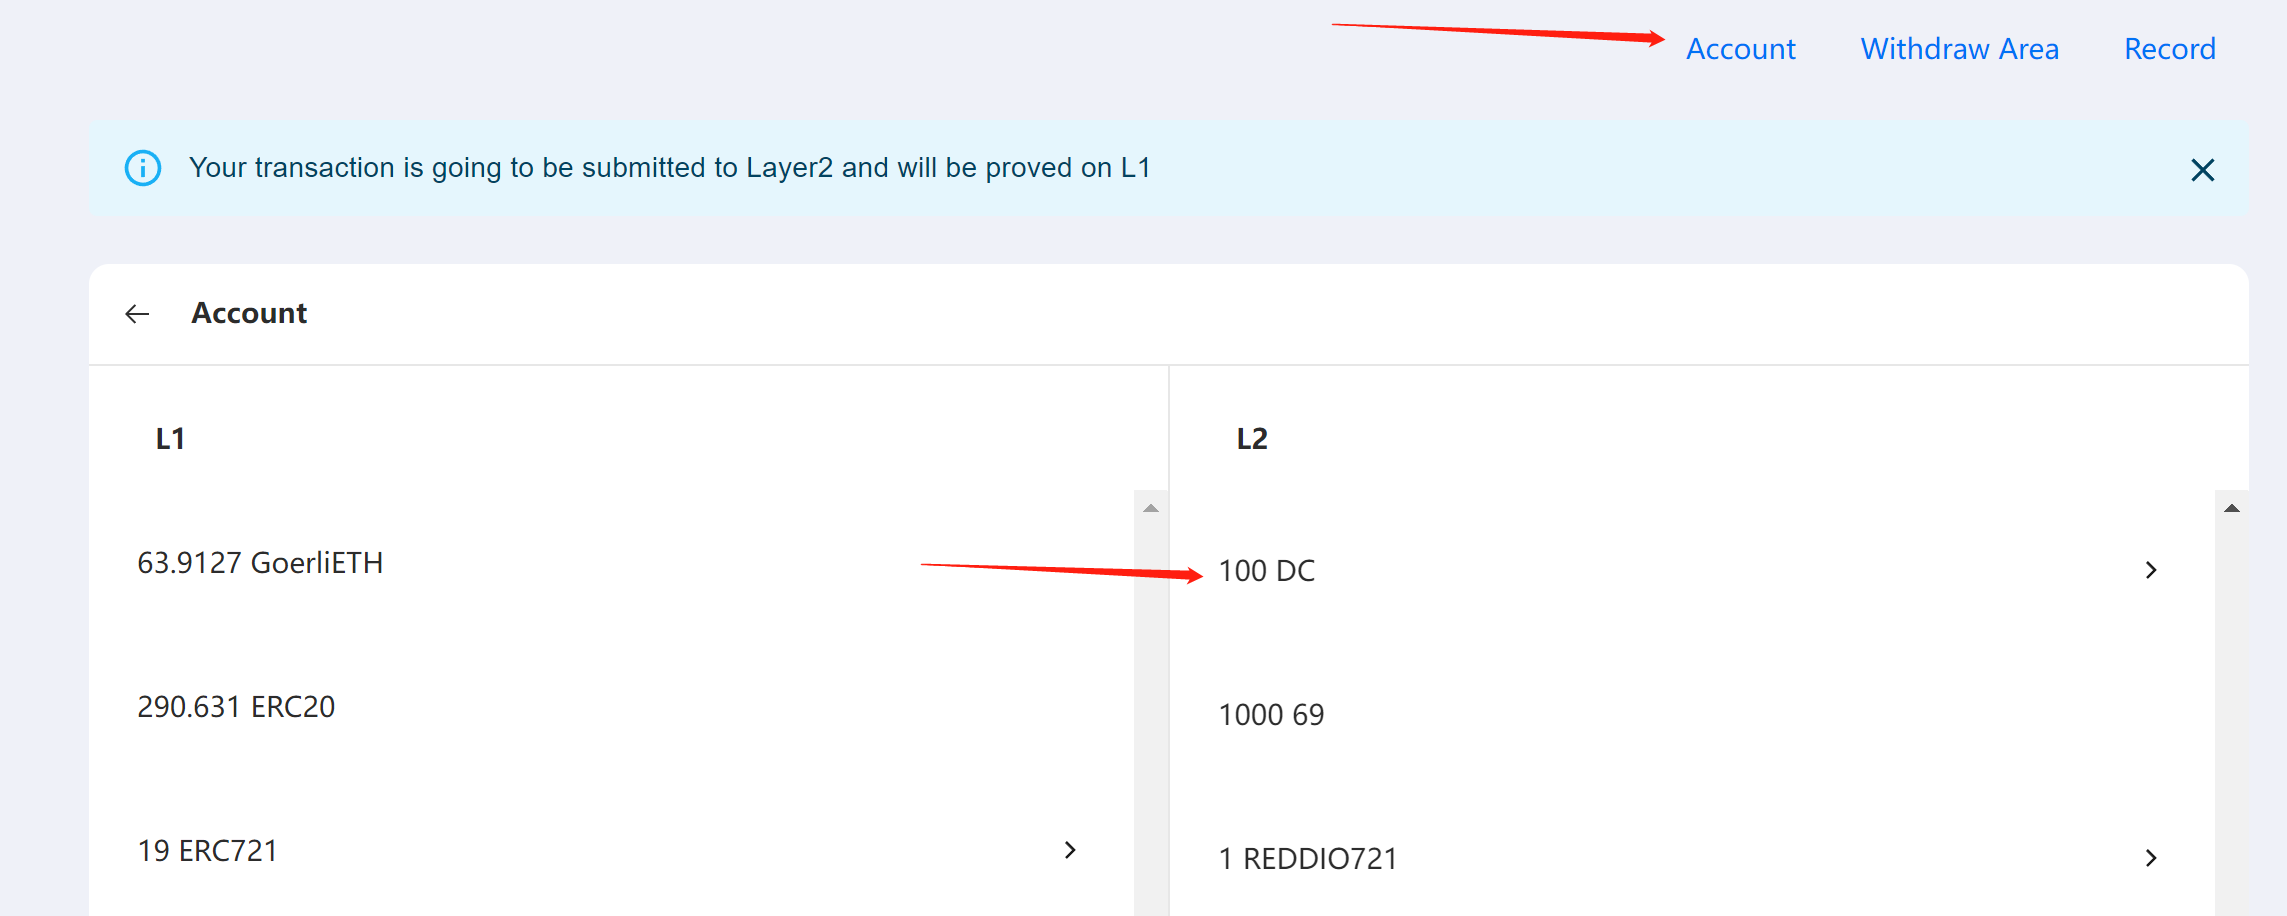
Now, you have successfully set up the metadata server. You can see if your NFTs have the right images through RedSonic's demo. After connecting your wallet with the demo page and go to the account page. You will see a list of tokens and NFTs on layer 2:
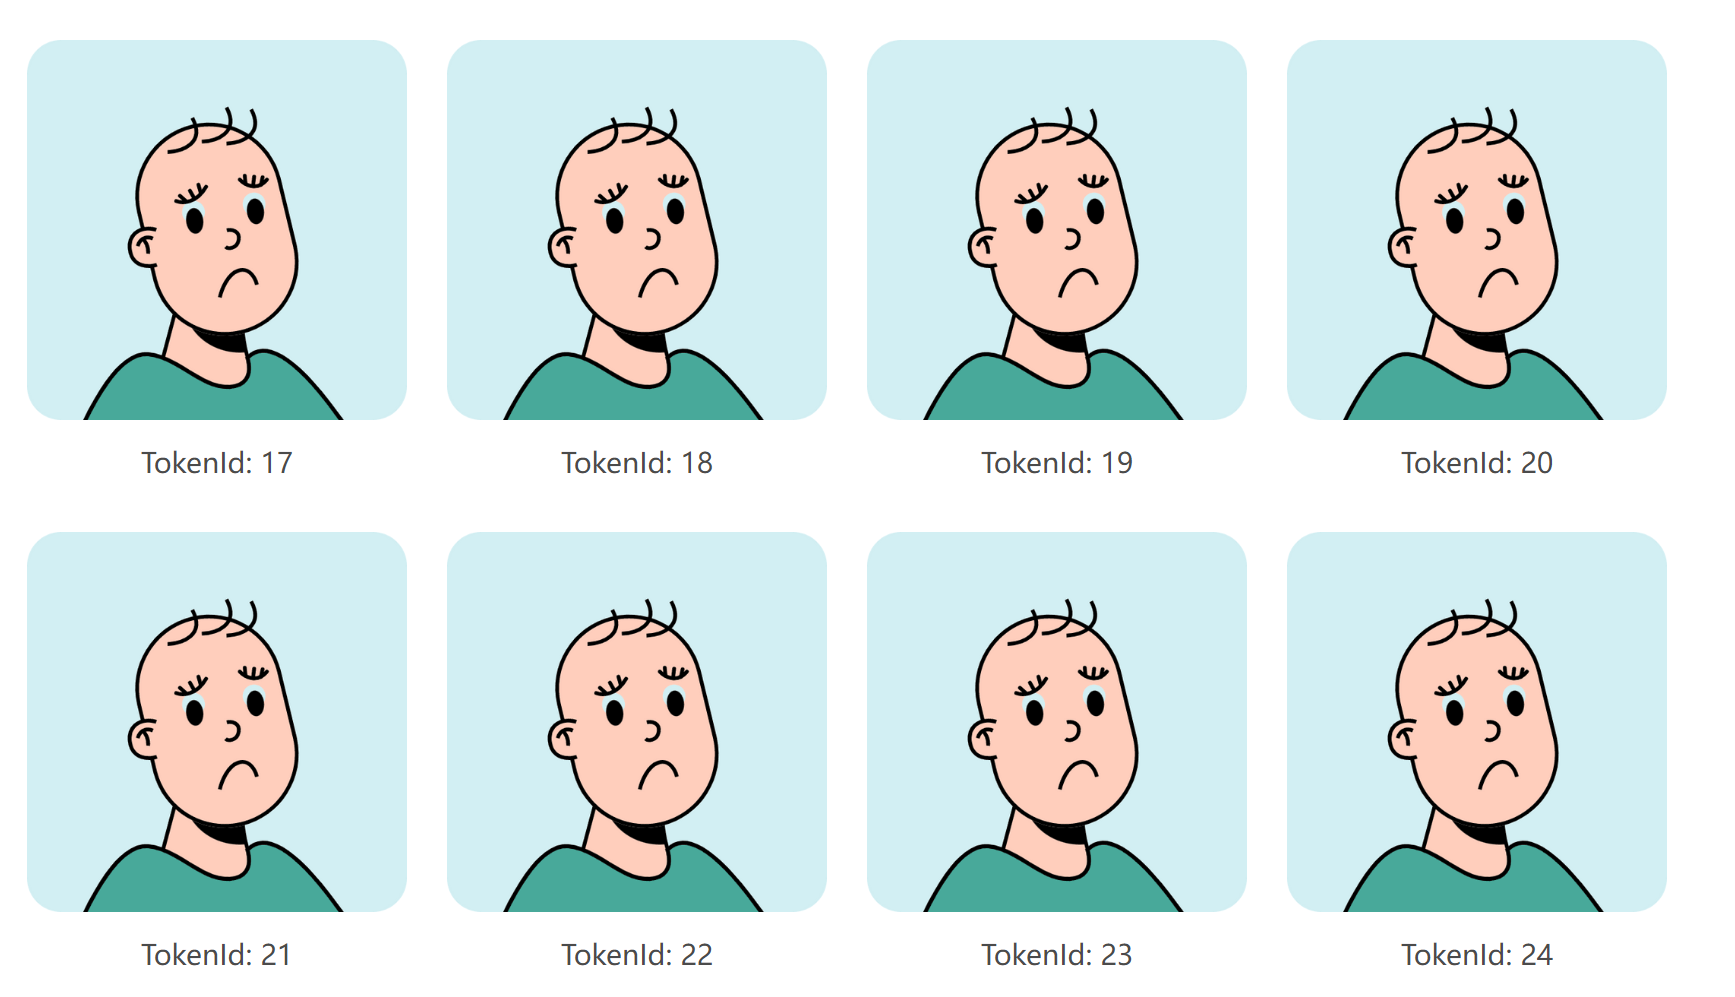
Simply select the NFTs symbol you just created, you will see the following images:
Withdraw NFTs to layer 1
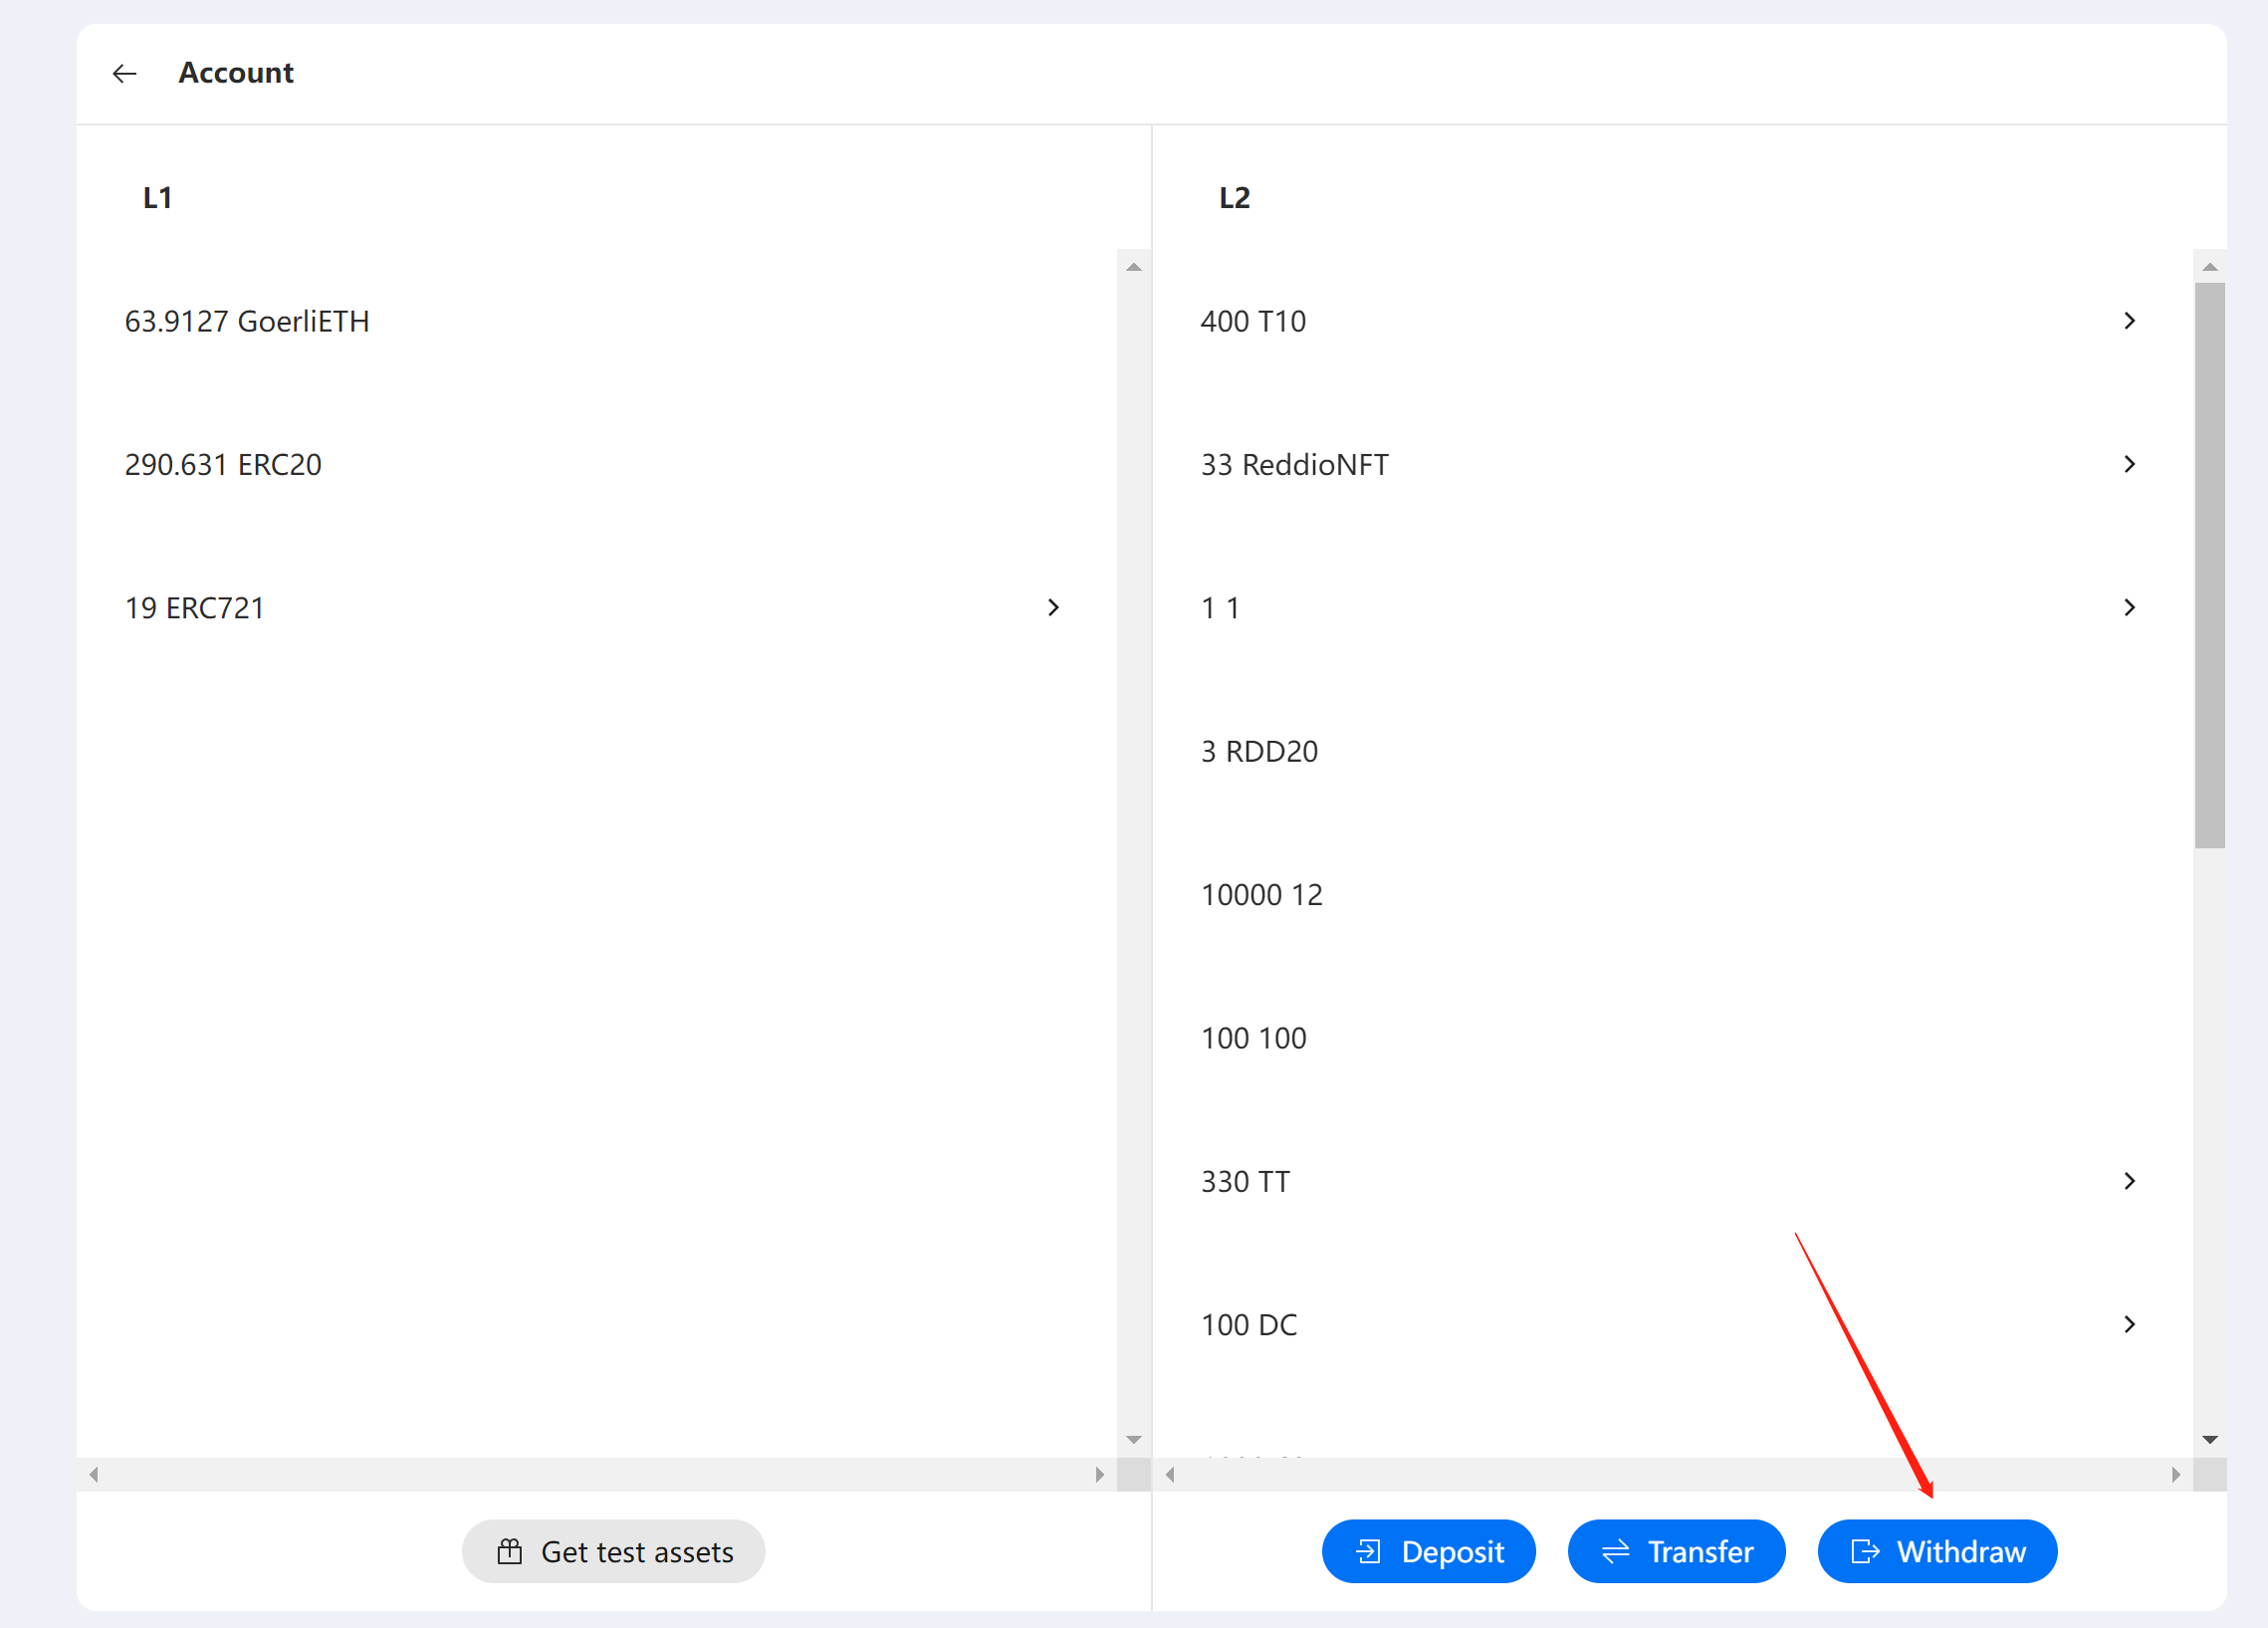
Now, you can withdraw your NFTs to layer 1 by clicking the "Withdraw" button on RedSonic's demo:
Then, you need to choose the right "Asset Type"、"ETH Address"、 and "Token Id" to proceed:
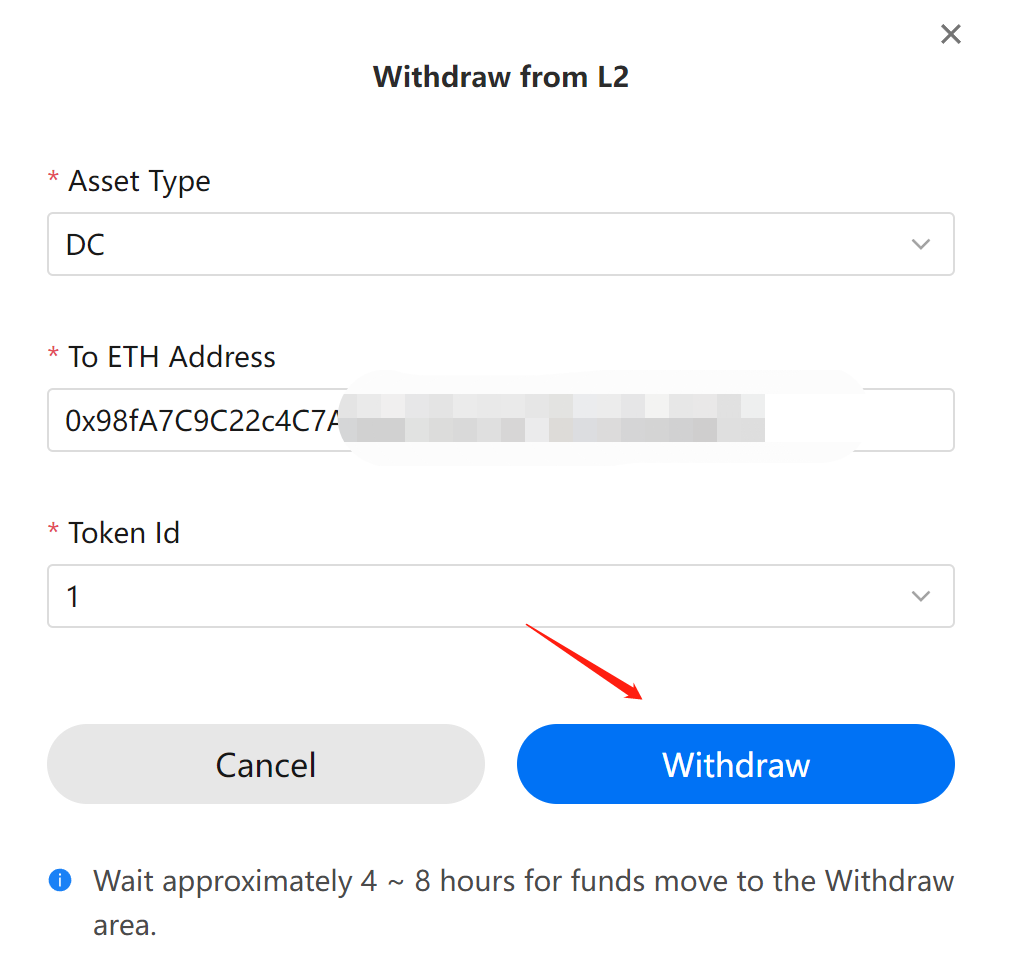
After about 4 hour waiting, you can see your NFTs are available for withdrawing to layer 1 on Withdraw Area:
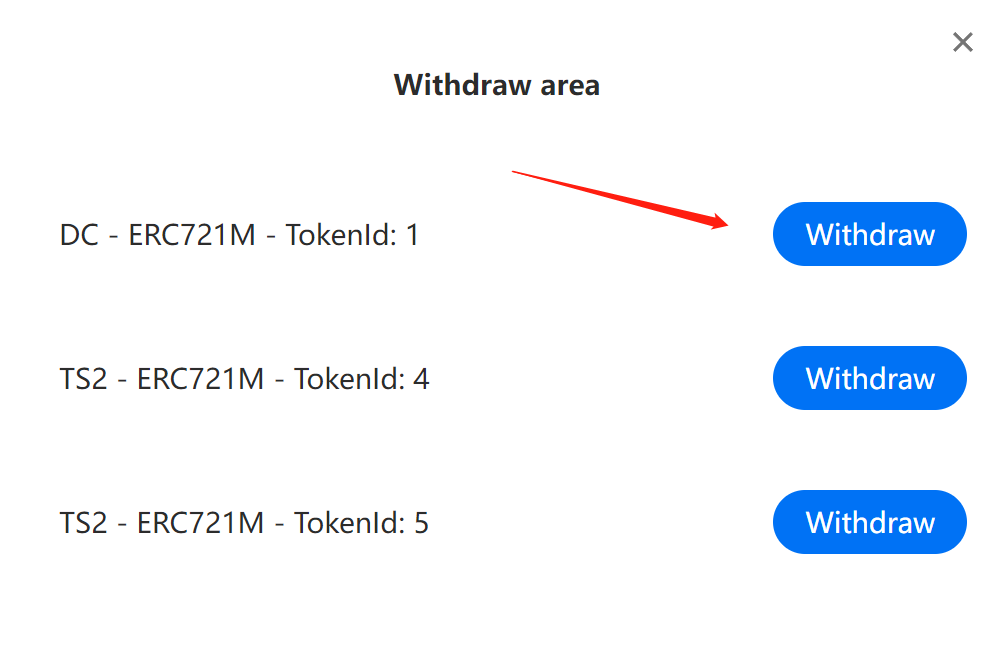
Now you can withdraw it to layer 1, this process will be done in seconds. After that, you will able to see the NFTs on Opensea.