Appearance
Issue Tokens On Layer 2
Introduction
Issuing tokens on layer 2 can bring several benefits to token holders and projects. First, it can reduce the gas fees required for transactions. Second, layer 2 can support higher transaction throughput, enabling faster and more efficient token transfers. Moreover, projects can create innovative solutions such as airdrops and liquidity mining programs to incentivize users and increase adoption. To issue Tokens on layer 2 you need to follow the steps below:
- Deploy an ERC20 smart contract on Dashboard
- Deposit ERC20 To layer 2
- Use RedSonic’s functionalities to do more
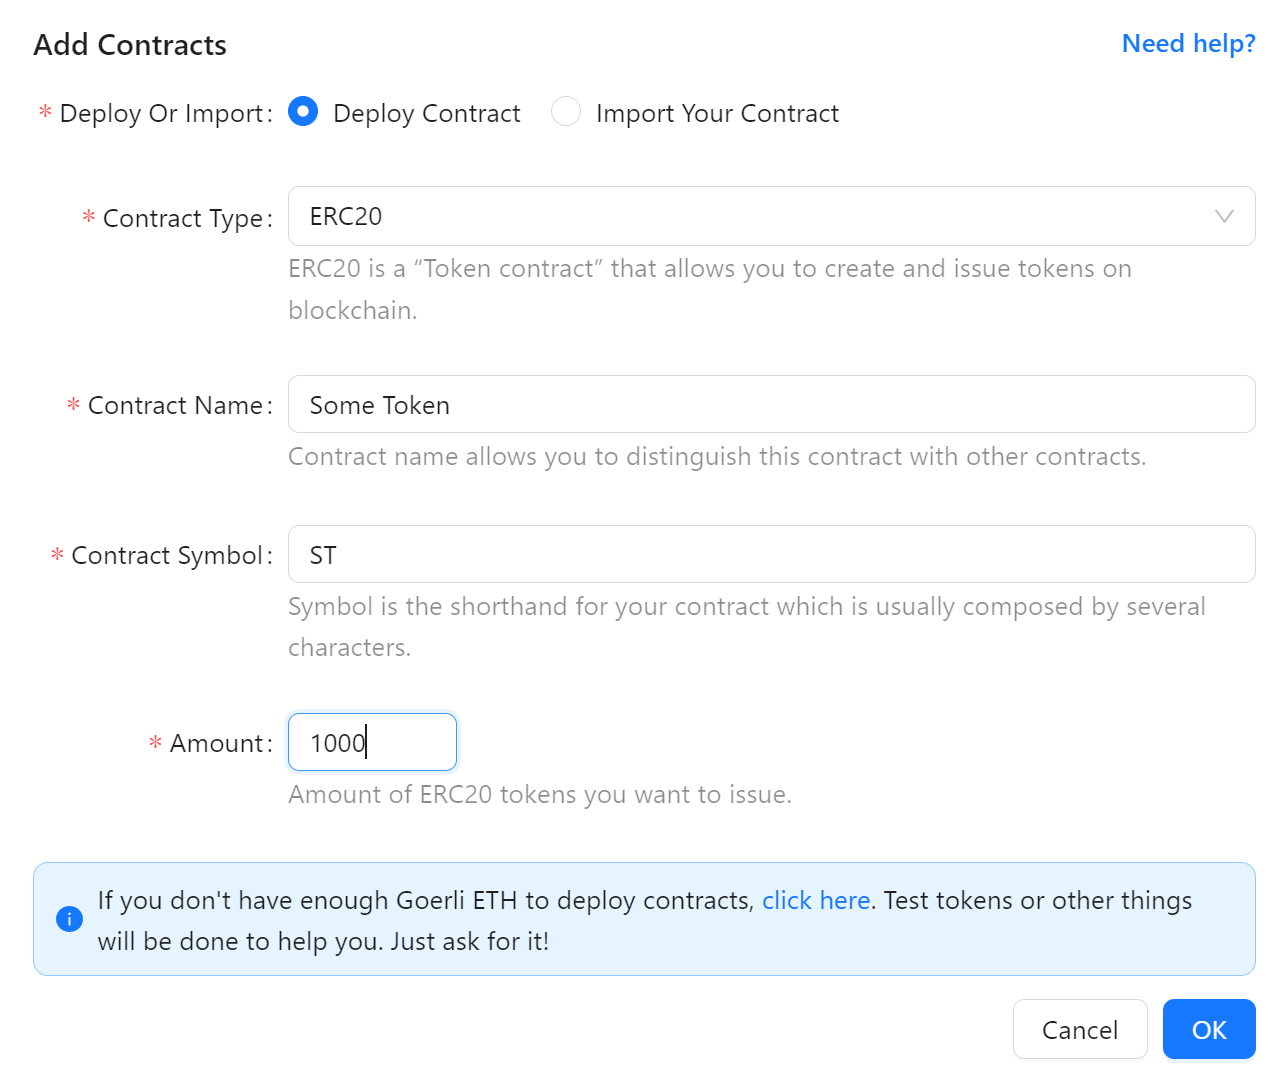
Deploy an ERC20 smart contract on Dashboard
You can easily deploy an ERC20 smart contract on layer 1 by utilizing RedSonic's Dashboard. Once you have registered on the dashboard, navigate to the contracts page and click on the "Add Contracts" button. Ensure that you select ERC20 as the Contract Type. And then, you need to type in all the information about this contract then click "OK":
Then, your wallet will pop up to prompt you to sign the transaction. Once you have successfully signed all the transactions, your deployment will be completed successfully.After that you will receive the smart contract address directly on the dashboard. To further explore the smart contract details on layer 1, you can refer to the comprehensive guide provided by RedSonic, which will guide you through the process of checking the smart contract details on Etherscan.
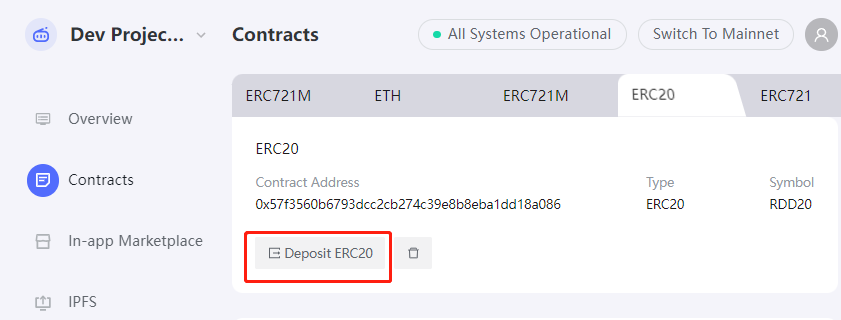
Deposit ERC20 to layer 2
To deposit ERC20 tokens from layer 1 to layer 2, there are two methods available: dashboard tool and SDKs.
For dashboard tool, you need to access RedSonic’s dashboard. After that, you need to go to contracts page. You will see a "Deposit ERC20" button under the ERC20 contract of your choice.
After clicking the button, a form will pop to ask for your input:
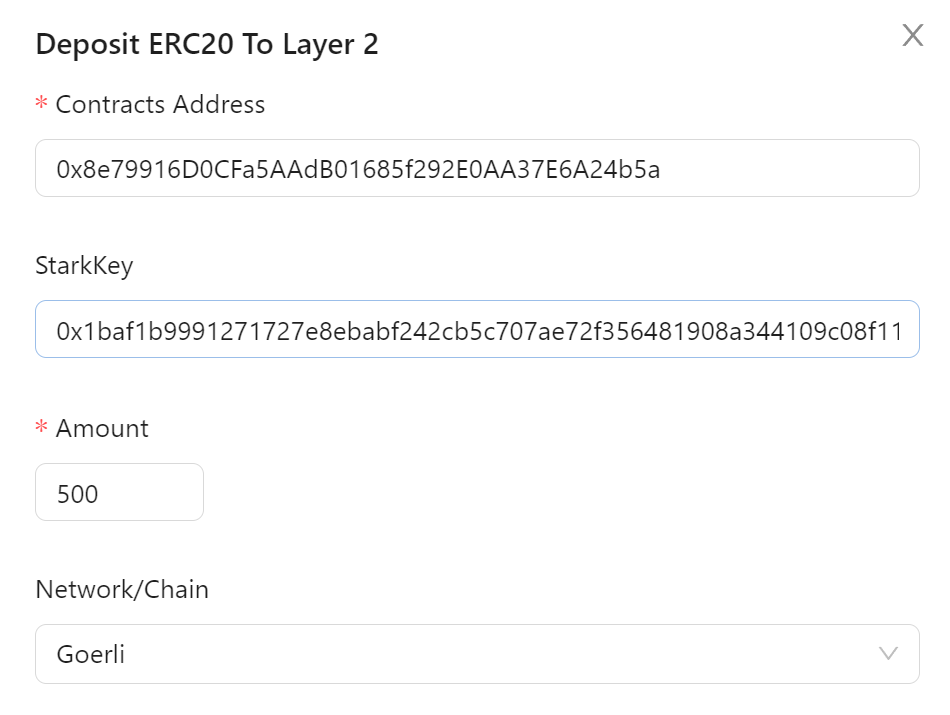
- Contract Address: the smart contract address you get via deployment.
- StarkKey: the address to receive ERC20 Tokens on layer 2. You can get it here.
- Amount: the amount of tokens you want to deposit.
- Network/Chain: the network you use. We recommend to develop your application on Goerli before do that on the mainnet.
After filling all the forms, you can click the “OK” button to deposit Tokens to layer 2.
For SDKs, you can check it here.
Once you finished the deposit operation, you can check your ERC20 balance by following this guide.
Use RedSonic’s functionalities to do more
After successfully depositing your tokens on RedSonic's Layer 2, you can leverage the platform's various features. For instance, you can perform an airdrop to your users using the transfer function. Additionally, you can allow your users to withdraw these tokens to Layer 1, enabling them to trade these tokens for other digital assets. We will provide you with a list of these functionalities in the "next steps" section for your reference.