Appearance
Withdraw NFTs To Layer 1 With Javascript SDK
Introduction
Welcome to our comprehensive guide on withdrawing Non-Fungible Tokens (NFTs) to layer 1 using RedSonic's Javascript SDK. We will take you through the entire withdrawal process, from start to final API call construction. Let's get started by following steps down below:
- Learn withdrawal process
- Prepration
- Withdrawing NFTs from Layer 2 to Layer 1
This tutorial will guide you through the process of using the Javascript SDK to withdraw NFT between the Ethereum layer 1 and layer 2 blockchains.
Learn withdrawal process
The withdrawal process in RedSonic is a sophisticated procedure to move assets from Layer 2 to Layer 1 (Ethereum). It is a crucial step for users who want to gain control over their assets on the main blockchain. Below, you'll find a concise outline of the process, followed by an emphasis on the parts that developers should concentrate on:
- Initiation The user initiates the withdrawal process, expressing their intent to transfer funds from Layer 2 to an Ethereum address in Layer 1.
- Transfer Execution Here, the application handles the off-chain movement of funds from the user's Stark key vault to another vault associated with the user's Ethereum address. It's the first step in connecting Layer 2 assets with the Ethereum mainnet.
- Validation and Processing StarkEx's gateway steps in at this stage to authenticate the transactions and process them as per the request. It's a vital step to ensure that the transactions align with the security and integrity protocols.
- Batching Valid withdrawal requests are grouped together and prepared for on-chain submission. This batching process ensures efficiency and cohesion in the handling of multiple transactions.
- Funds Movement StarkEx ensures the appropriate movement of the funds to the withdrawal area on the blockchain. It's the transitional phase that bridges the off-chain transactions with the on-chain actions.
- Final On-Chain Withdrawal Finally, the user withdraws the funds on-chain to their desired recipient. This step marks the completion of the Layer 2 to Layer 1 asset transfer.
For developers working on integrating withdrawal functionality, the main concentration should be on step 5, the movement of funds to the withdrawal area, and step 6, enabling users to withdraw the funds on-chain. These two steps are the core of the on-chain interactions that require precise execution with our APIs.
The remainder of this tutorial will detail how to withdraw Non-Fungible Tokens (NFTs) from Layer 2 to the withdrawal area and then to Layer 1, enabling the recipient to receive the NFTs in their desired address. The intricacies of NFT withdrawals demand careful handling, and this guide will provide the insights needed to navigate this process smoothly.
Preparation
You can get the project repo. After you cloned the project in your device, you can use following prompts to install all the dependencies.
bash
yarn installAfter install all the dependencies, use following prompts to start the project:
bash
yarn startBefore getting started, you need to first have your own NFTs on layer 2. You can check Mint NFTs On Layer 2 to mint your first NFTs.
During your application implementation. There shall be a form asks for NFT contract address. This contract address is located at Dashboard's contract page, you can click on the copy button to copy your contract address:

For testing purpose only, we will use the REDDIO721 as an example. REDDIO721 is the NFTs we use in RedSonic’s demo. The REDDIO721’s contract address on Sepolia testnet is:
bash
0x941661bd1134dc7cc3d107bf006b8631f6e65ad5Connect to wallet
If you want to deposit, transfer, and withdraw tokens between the Ethereum layer 1 and layer 2 blockchains, you need to connect to your wallet first. We will use Metamask as an example to show you how to connect to the wallet and create Stark keypairs based on it. There's one thing to note that one Metamask wallet address will generate the same Stark keypair.
tsx
async function connectToWallet() {
    if (typeof window !== 'undefined') {
      //First, get the web3 provider if window is not undefined
      const provider = new ethers.providers.Web3Provider(window.ethereum);

      //Second, we need to ask the wallet to switch to specific ETH network
      //We will use Sepolia testnet to give example.Its hexValue is 11155111.
      await provider.send("wallet_switchEthereumChain", [
        { chainId: ethers.utils.hexValue(11155111) },
      ]);

      //Third, getting the account addresses from provider
      await provider.send('eth_requestAccounts', []);
      const signer = provider.getSigner();
      const ethAddress = await signer.getAddress();

      //Finally, we can create a new reddio instance (Sepolia testnet)
      //And assign global variable to it
      const reddio = new Reddio({
        provider,
        env: 'test',
      });
      setReddio(reddio);

      const generateKey = async () => {
        try {
          //Generate stark private key and public key
          //Store them into array
          const { privateKey, publicKey } = await reddio.keypair.generateFromEthSignature();

          //We will set ethAddress/starkKey/privateKey on our array
          setEventValue({ ...eventValue, ethAddress, starkKey: publicKey, privateKey })
        } catch (error) {
          console.error(error);
        }
      };

      generateKey();
    }
  }
After you start the project. You will see a "Connect wallet" button in the main page, after clicking on the button. MetaMask will show up and ask you to login.
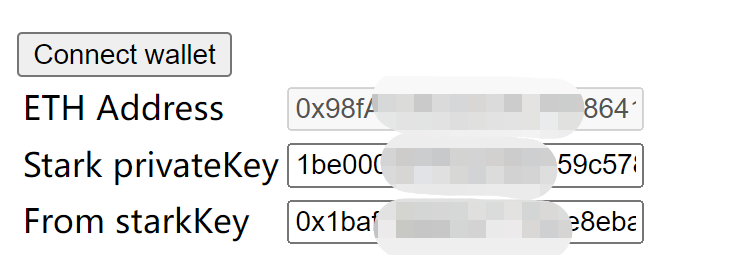
After login into your wallet, your address will be shown on the "ETH Address". And your stark key and stark private key will be shown on the forms. If you see your wallet’s address, that means your wallet is successfully connected to the application.
Certainly! Below is the revised version of the article:
Withdrawing NFTs from Layer 2 to Layer 1
The withdrawal process is broken down into two essential steps:
- Move Assets to Withdrawal Areas: This is the step where the assets are withdrawn from Layer 2. This part of the process involves moving the assets to the designated withdrawal area. It's worth noting that this step may take around 4 hours to complete. You can check the withdrawal status here.
Below is an example of how to implement the withdrawal of an NFT from Layer 2:
tsx
async function withdrawNFTFromL2() {
    const { starkKey, contractAddress, tokenId, privateKey, receiver } = eventValue;
    if (reddio) {
      // Withdraw tokens from Layer 2 (Move assets to the withdrawal area)
      // This process usually takes about 4 hours
      const { data } = await reddio.apis.withdrawalFromL2({
        starkKey,
        privateKey,
        receiver,
        type: "ERC721M",
        contractAddress,
        tokenId,
      });
      console.log(data);
    }
  }
In this code snippet, the function withdrawNFTFromL2 handles the withdrawal from Layer 2. It specifies the asset type as ERC721, which corresponds to the NFT standard, and uses the withdrawalFromL2 API call from reddio to facilitate the process.
Please take into consideration the time required for this operation. The withdrawal from Layer 2 is not instantaneous and typically takes around 4 hours. Monitoring the withdrawal status is a good practice to keep users informed and ensure a smooth user experience.
Certainly! Here's the revised version:
- Withdraw Assets to Layer 1: The latter phase of the withdrawal process culminates in the transfer of assets to a recipient address chosen by the user on Layer 1.
Implementing this stage demands precision and adherence to specific details. The application must be configured to accommodate asynchronous operations and the parameters must be defined accurately. Below is a snippet illustrating how to conclude the NFT withdrawal from withdrawal areas by leveraging the function withdrawFromL1:
tsx
async function withdrawFromL1() {
  const { starkKey, contractAddress, tokenId, privateKey, receiver } = eventValue;
  const assetType = "0x2d6e7b6a8e809f94ed4bef245e06437c18e033044a5787e15eda57be47929f";
  const type = "ERC721M"; // This could also be 'ETH', 'ERC20', 'ERC721', or 'ERC721MC'

  if (reddio) {
    // Finalize withdrawal by moving assets to Layer 1
    // Note: This must be preceded by a call to withdrawalFromL2, and a waiting period of approximately 4 hours
    const { data } = await reddio.apis.withdrawalFromL1({
      starkKey,
      assetType,
      type,
    });
    console.log(data);
  }
}
This code segment is designed to function as the concluding step in the withdrawal sequence, pulling the assets from the withdrawal area to Layer 1. Adhering to the guidelines and methods presented in this guide ensures the successful integration of NFT withdrawal functionality into your application.